Final product.
There are a number of things I would like to talk about the product we have decided to advertise. The general idea is to advertise the product, through the energetic type of advertisement. This means that the advertisement will be scary, fast, with a huge variety of shots. Therefore, I have decided to create the commercial which advertises the different sports like Rugby, Basketball and Boxing, as I think those sports are very violent, with a huge number of action and the health hazards. Therefore, professional players do drink my product to keep them on track and ready for the next fight/game.
This is the final project that have been finalised with the client.
Previous project.
Brief.
To create an commercial for a new sports drink which has an appeal to a target audience who is interested in maintaining health and fitness but which would not preclude a wider mass market audience. The commercial should feature a sporting theme.
Client response/feedback:

This feedback have given me so much information that i have to take in account as it is really important I satisfy the client as the whole job is based around his opinion. Therefore, I have done some massive changes to my final project, which have made the final peace look better and more continuous and finished. Therefore, this feedback helped me a lot to finalise my project.
Summary
1) The main idea of the feedback was to change the name of the product. Originally it was called:" Estragon" which have been named for a special asian leafs that have been used to create a refreshing drink, but after a long discussion with the client we have decided to change it to a "Sofiz" as the name was created by mixing 2 words that sinonims our drink which are "Soft" and "Fizzy" drink.
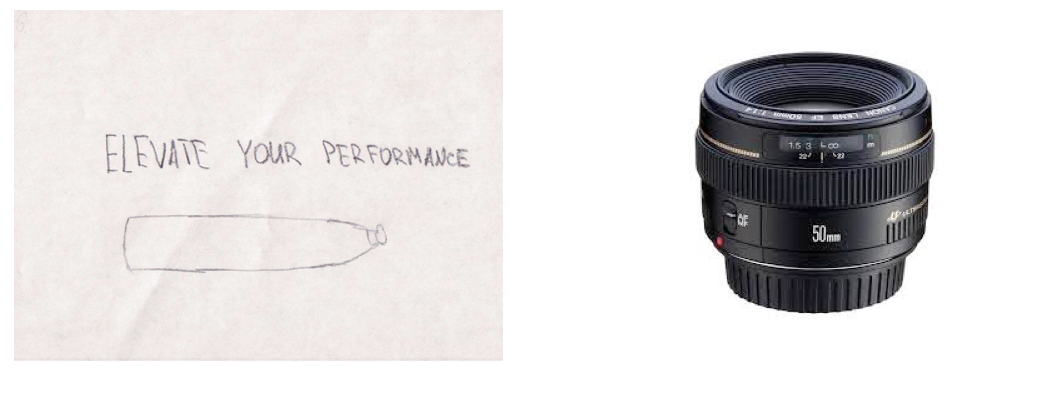
2) In the same time, we have been thinking on the strap line, which will motivate people to buy the specific product. The main idea was " Get Fizzical" but after some discussions, we came up with "Elevate your performance" which we think is the best for the energy drink like ours.
3) At that time, we have discussed the design of the bottle, and agreed that client likes the design as it makes the bottle "Stand out" , but the issue that have been mentioned, was the look of the name. The label have to be with a great font style, as the drink will stand out, which makes the drink unique. Therefore, I have thought of the design and we have agreed the specific design which is that one:

4) Also I have
Following production process.
Recce Sheet.

Now I would like to talk about the equipment I am planing of using.
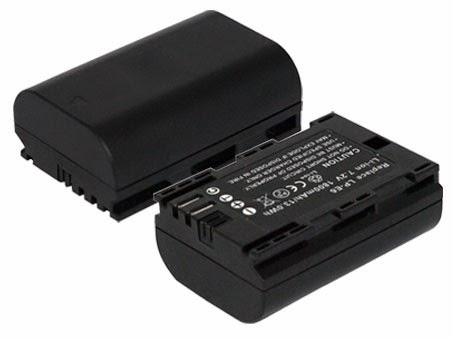
Camera - Canon 7D DSLR + Battery.

.jpeg)
.jpeg)
.jpeg)
.jpeg)
Those images shows the camera Canon 7D DSLR which we have been using nearly at all the time to take those amazing shots. This camera allowed us to take different shots with the use of different lenses.
32GB Compact flash card.

This flash card was always in our Canon 7D DSLR camera where the all footage have been saved. After every time we done our photoshoot, we would have to transfer the data to our laptops.
.jpeg)
This lens is giving you a normal human eye effect. Therefore, I have been using this lens for nearly every shot I have done. There are some pictures to show those shots:

.jpeg) I have used those lens to make some wide shots. Therefore, I haven't use it for a lot of my shots, but there were some shots there this lens was essential. There are some examples of it:
I have used those lens to make some wide shots. Therefore, I haven't use it for a lot of my shots, but there were some shots there this lens was essential. There are some examples of it:
.jpeg)
The tripod is essential part of equipment as well as camera, because tripod allowed me to steady and focus our camera so the footage will be high quality. Therefore we have made sure that we use it at all the time as the camera will not pick the high quality picture as long as it is focused and ready. There a plenty of different shots that have been done with this part of equipment.
.jpeg)
.jpeg)
.jpeg)
Camera bad is essential equipment, because it protects camera in case it falls. Therefore, we have used this bad at all the time during while I have transporting the equipment from different locations.
KIT-N15-DRIVE - Ianiro Gulliver Lighting Kit
Canon 50 mm f/1.8 mf/af.
This lens is giving you a normal human eye effect. Therefore, I have been using this lens for nearly every shot I have done. There are some pictures to show those shots:
Canon 18-55mm zoom f/3.5-5.6 mf/af.
Tripod - Velbon DV6000 + carry bag.
The tripod is essential part of equipment as well as camera, because tripod allowed me to steady and focus our camera so the footage will be high quality. Therefore we have made sure that we use it at all the time as the camera will not pick the high quality picture as long as it is focused and ready. There a plenty of different shots that have been done with this part of equipment.
Canon camera bag.
Camera bad is essential equipment, because it protects camera in case it falls. Therefore, we have used this bad at all the time during while I have transporting the equipment from different locations.
KIT-N15-DRIVE - Ianiro Gulliver Lighting Kit .jpeg)
.jpeg)
.jpeg)
Light kit is really important peace of equipment, which is useful in dark rooms, where you can make professional lightings. I had to use it at all the time, as the actors faces were covered in shadows, but my pictures were requiring a high level of light so it is easier to edit those pictures in the future.
Scene 1.

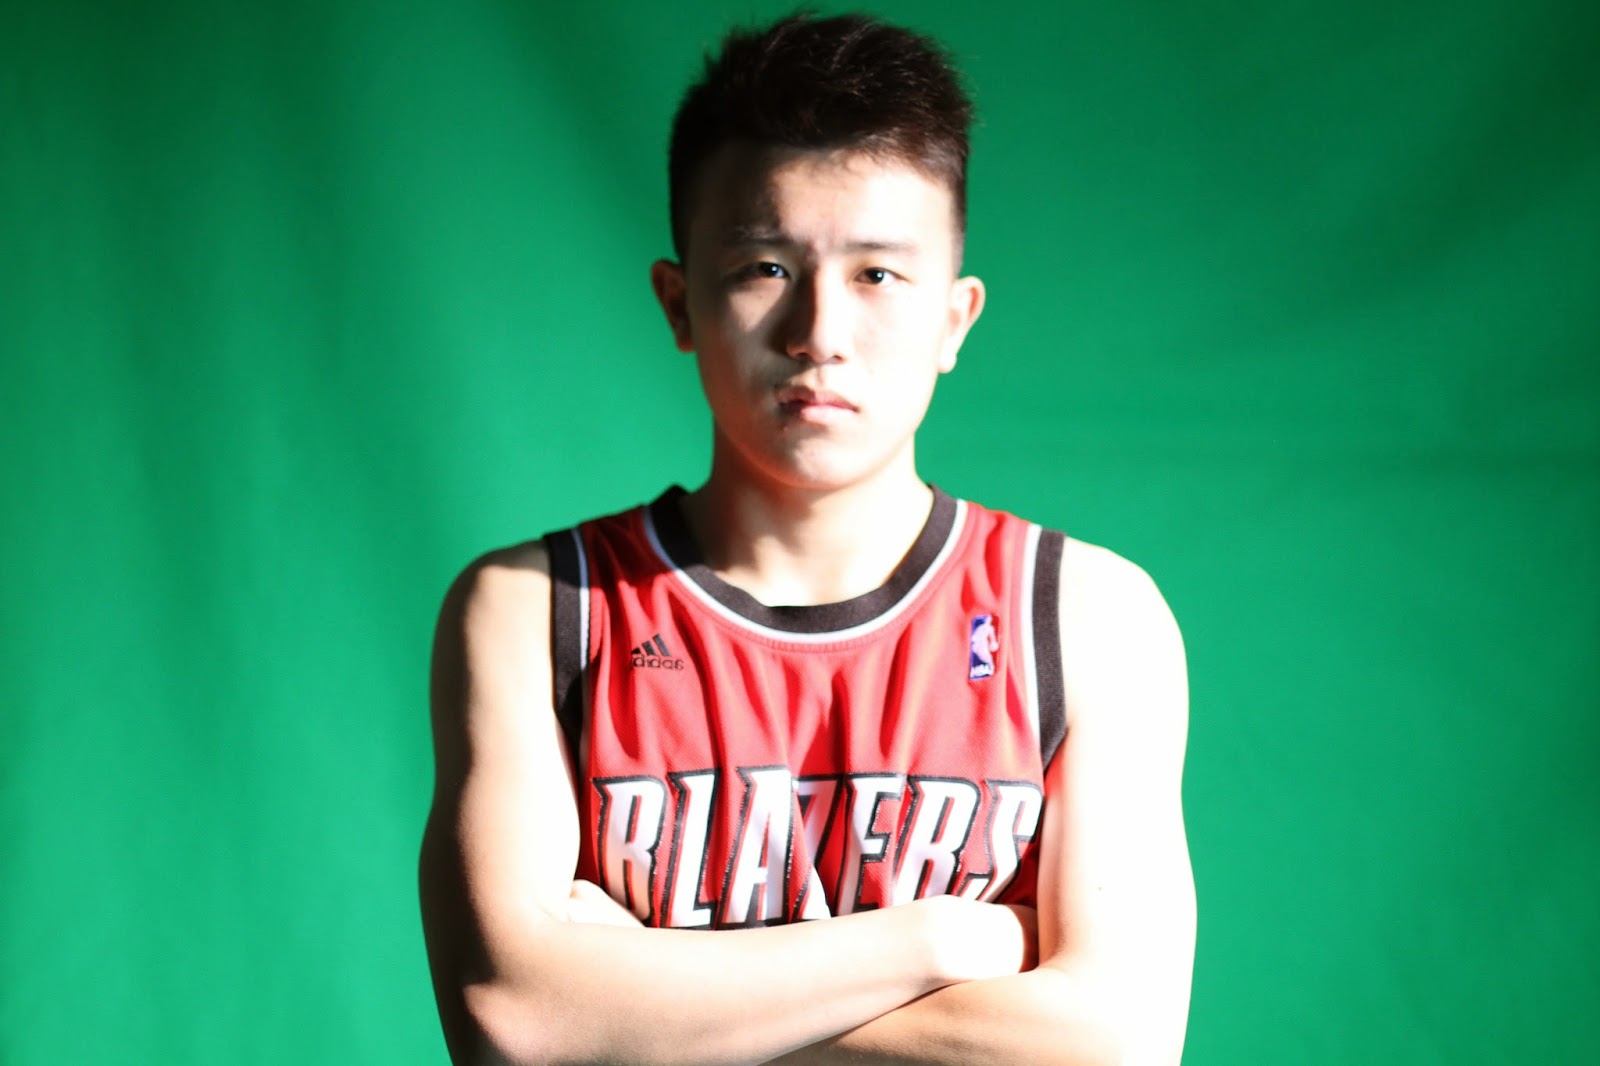
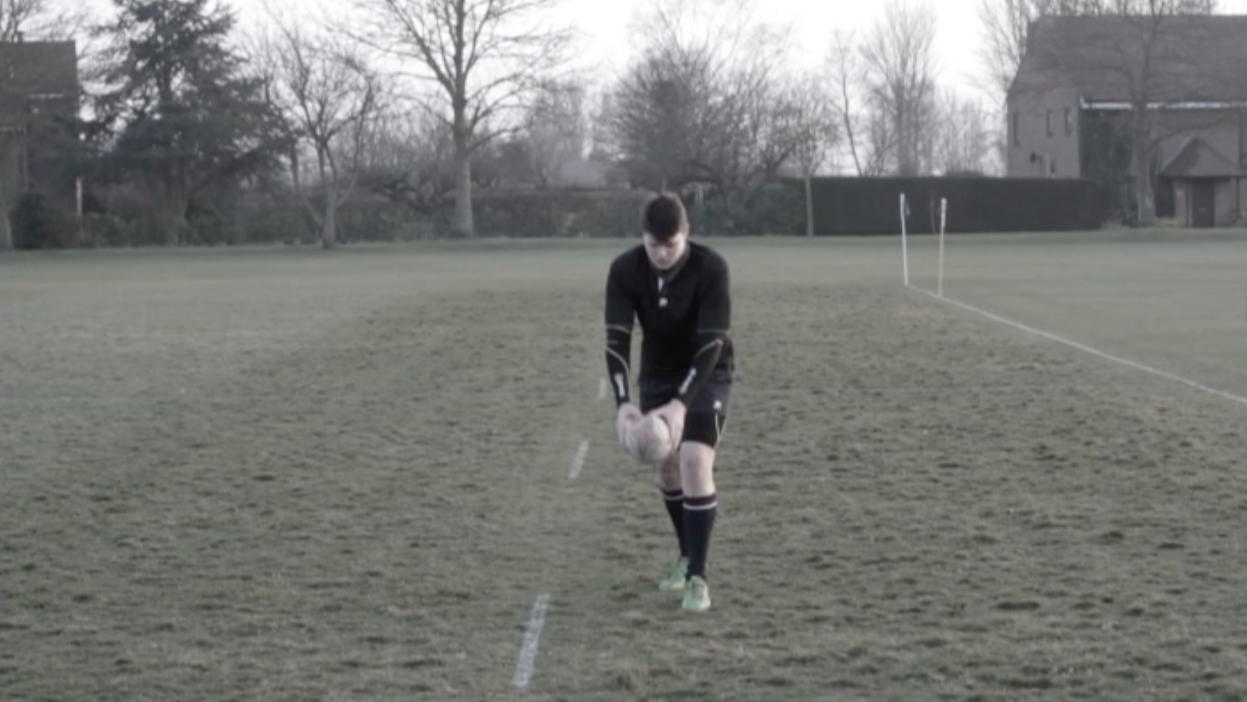
In this scene, the main idea was to take a medium shot of a player talking to the audience and creating a scary feel and in the same time motivating people to do variations of things. This is the whole purpose of the advertising that I am doing.

Scene 3.

Scene 4.

Scene 5.
Scene 6.

Scene 7.

Scene 8.
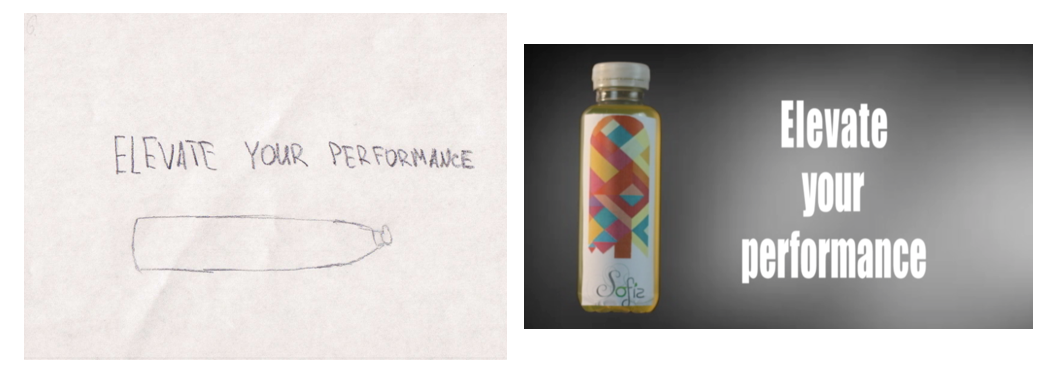
In this scene, the main idea was to take a medium shot of a bottle representing to the audience and showing the actual product design so the people will know what to buy.
Working with the equipment.
Scene 1.
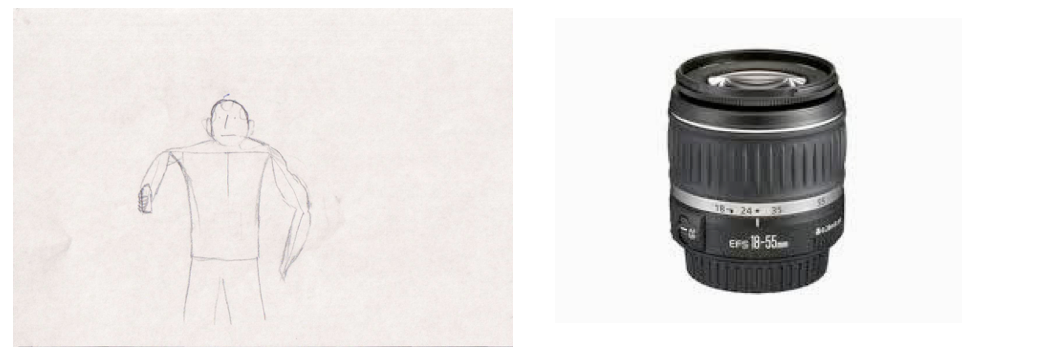
In this scene, the main idea was to take a medium shot of a player talking to the audience and creating a scary feel and in the same time motivating people to do variations of things. Therefore to make it more contrast, i have decided to use 18-55mm lens as it is the most suitable for this shot.
Scene 2.
Scene 3.

Scene 4.
Scene 5.

Scene 6.

Scene 7.

Scene 8.
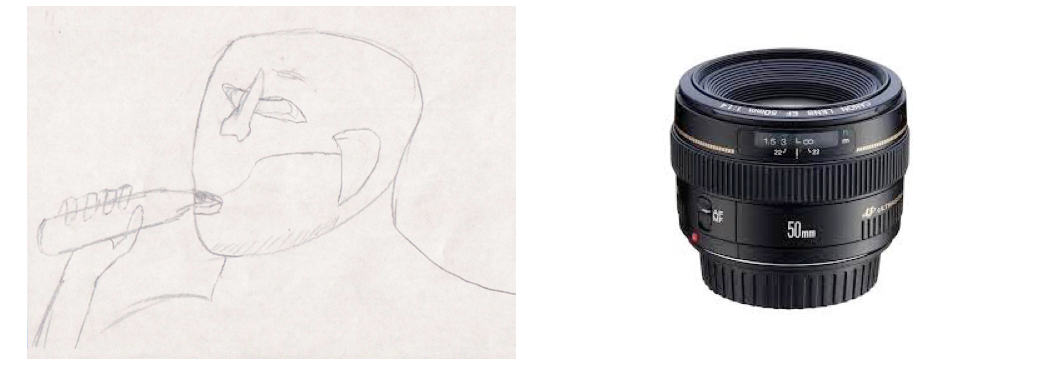
In this scene, the main idea was to take a medium shot of the bottle as it is the main shot - to show the actual design. Therefore, I decided to go for 50 mm lens as i feel that this is the best option.
Following safe working practices.
In order to protect my actors and the people that have been helping out, I have done the risk assessment which shows the main hazards that could happen during the photographic shot and they have to be careful and aware of them. Therefore, I have included the top 5 hazards that I would want to be aware of.
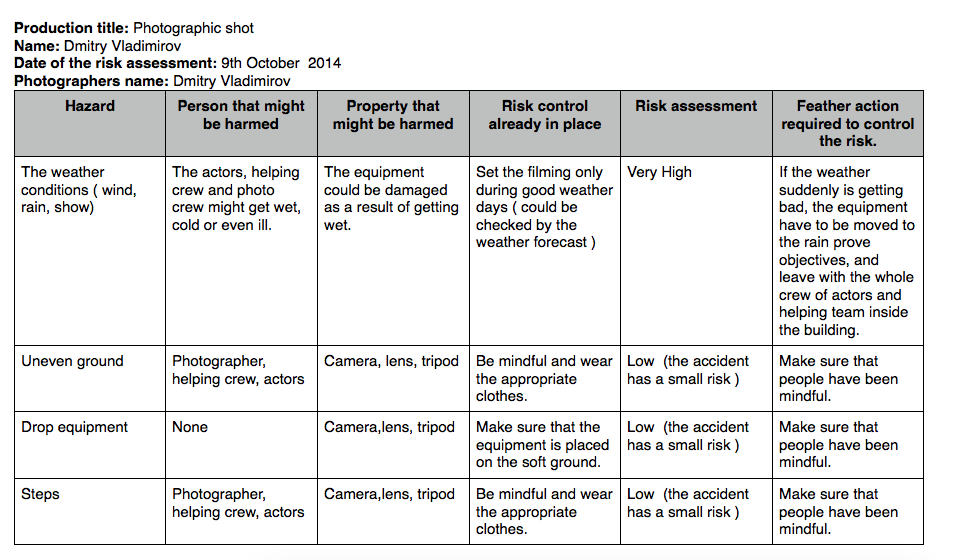
This risk assessment have helped us a lot in the way that when we have been going outside to do some shots, the risk assessment were reminding of what shouldn't we do and how to use the equipment. In the same time, it provided many models and photographers from every harm you could possibly get by using those equipments.
In the same time I have thought about the Key Grid and this chart made my shooting schedule a little easier.
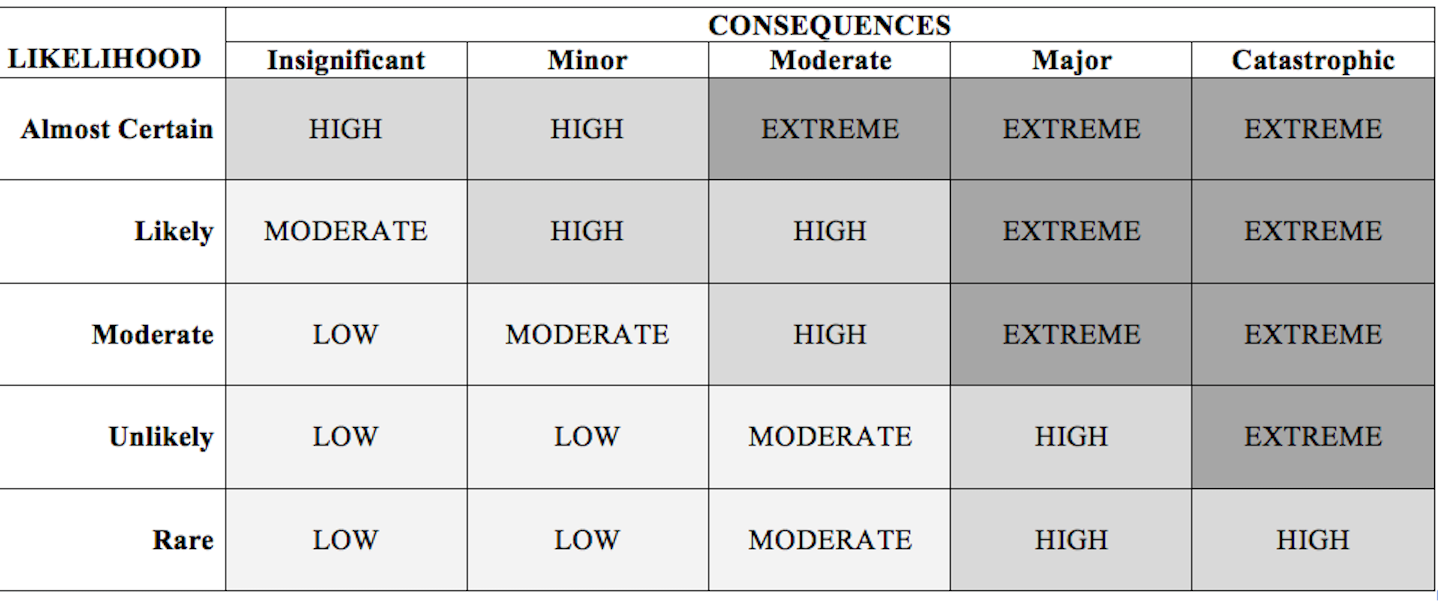

This is a very important shot as the player is dealing with the heavy weights, which means there should be a professional coach looking after the actor as he might injure himself with those weights.

Logging rules/creating edit decision list.
Step 1.

Step 2.
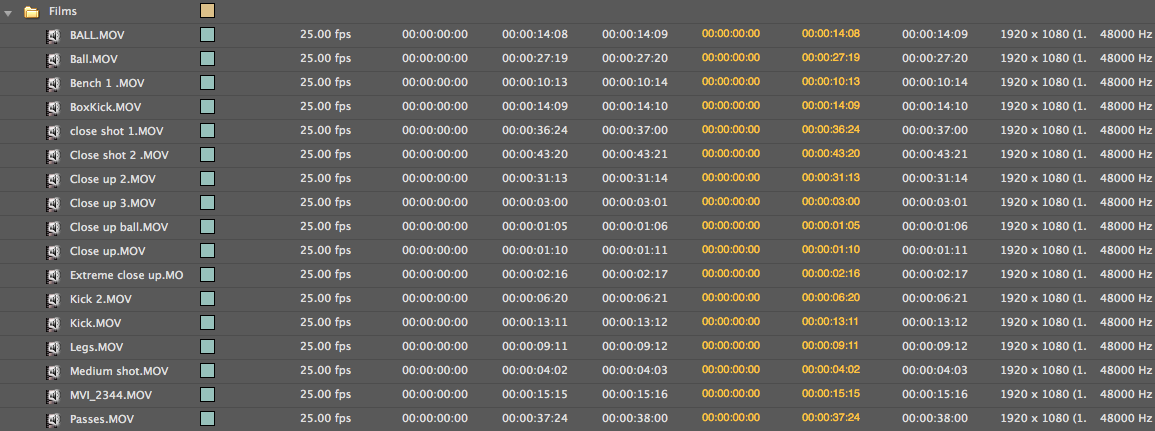

Step 3.

In this final step, I will show you that it is very easy to work with the data I have covered as it is all remained.
Producing and reviewing an off line edit.
Step 1.
In this section I will be taking about why did I put those shots in the specific order. To begin with, before I have started to edit, the client have told me what he is expecting from me, and the general idea of how the final project needs to look.
Step 2.

Step 3.

Therefore, the final video is made out of very quick shots that make the video more energetic and fast, and this is the main aim I was going for.
Apply appropriate visual effect and transitions.
Step 1.
Step 2.

Step 3.

Step 4.

Step 5.

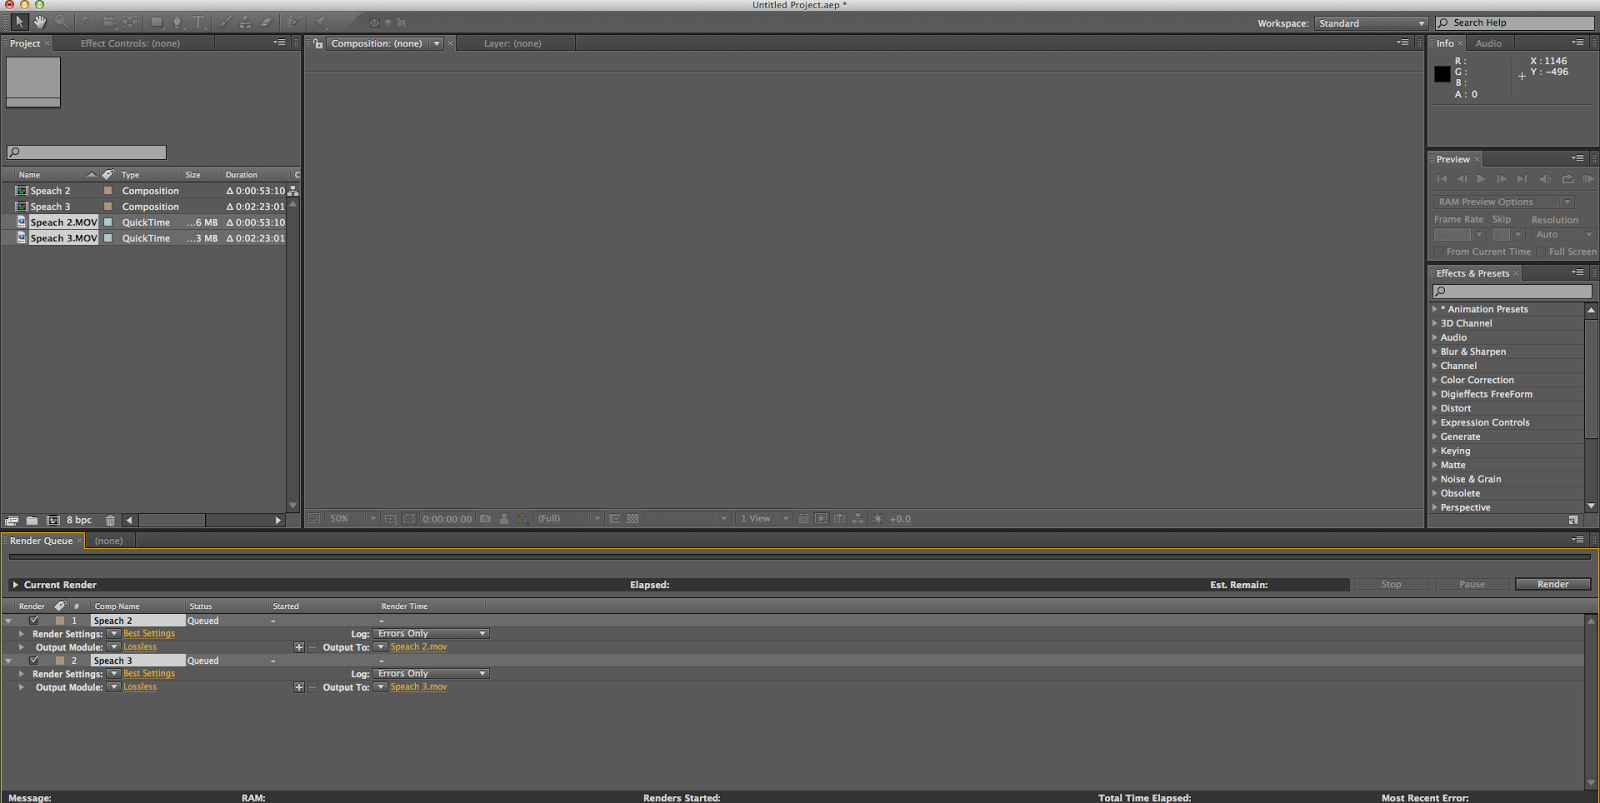
Setted up the suitable characteristics for my video in order to render it.
Step 6.

And in this shot you can see how the video is rendering.
Colour correction.
Step 1.

Step 2.

Step 3.
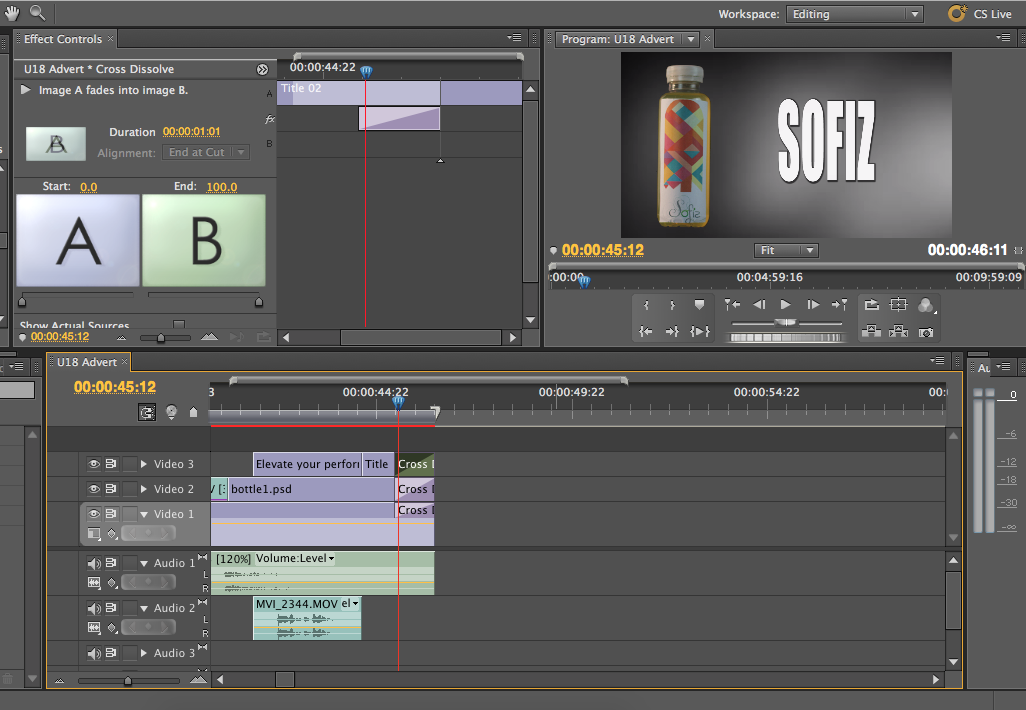
The last video effect I have been using is the Fade out in the end of the commercial, in order to make this video more slick and nice looking.
Linking audio to visuals and applying audio effects.
Working with the actual music.
Step 1.
In the video, there was an issue with my sound quality which means that you can not really hear what the actor was saying. Therefore, i decided that while he is saying that part I will decrease the music level so it is more clearer of what he is saying.
Working with the music in Audacity.
Step 1.
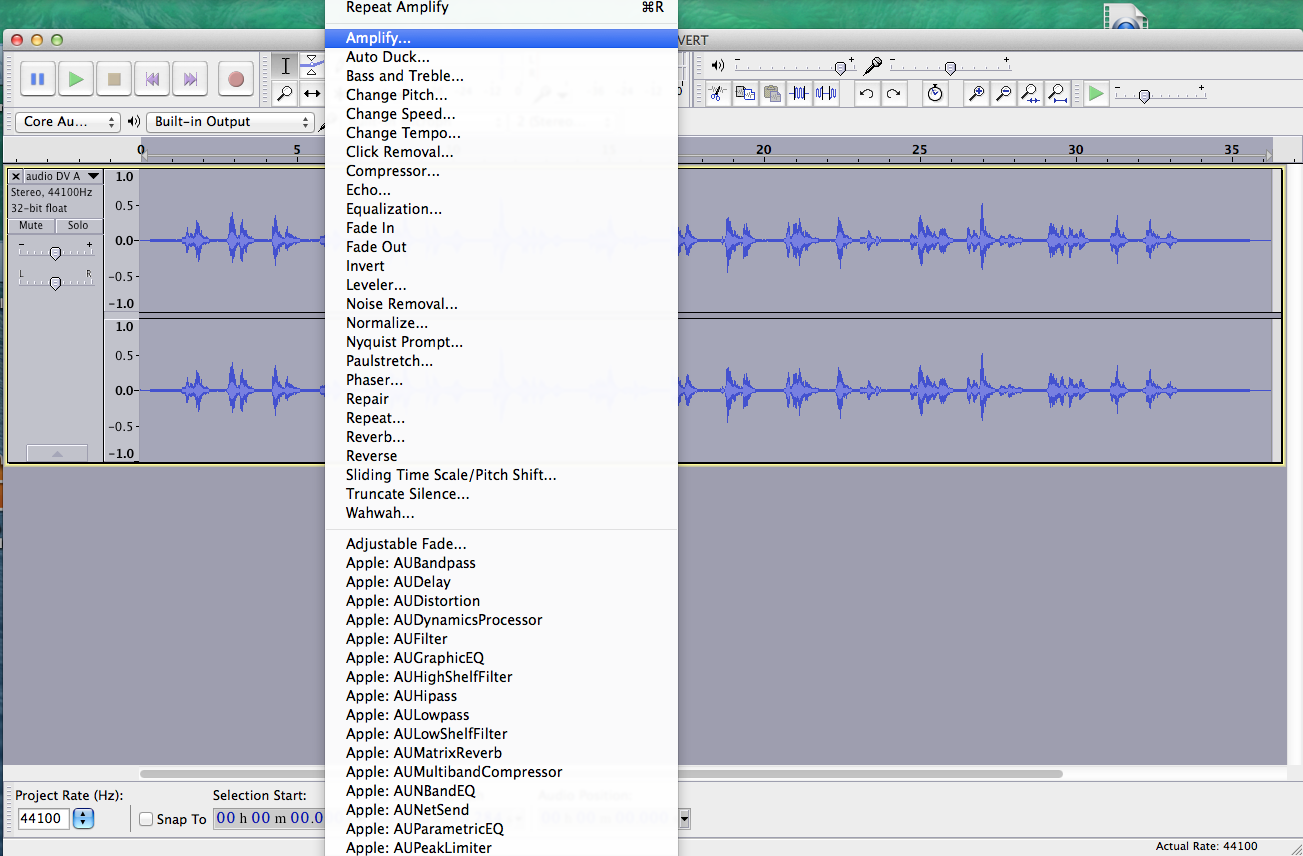
I have selected the music which I will need to work on and went to Effects - Amplify.
Step 2.


As you can see the sound wave have increased dramatically from the beginning.

In the same time, my audio had a lot of noise in the background, thats why I have decided to get rid of this noise by selecting Noise removal.
Step 5.

Than you select/ change the setting to the setting you need and press "Ok" so it changes the music to you preference.